.jpg?auto=format%2Ccompress&crop=faces&fit=crop&h=48&q=70&w=48)
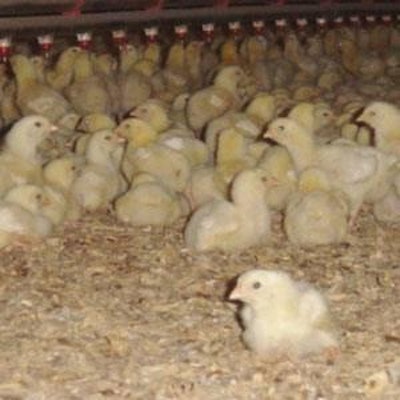
Dry litter helps keep broilers healthy, control poultry house ammonia levels and minimises the risk of carcass condemnations because of breast blisters and hock burns.
Keeping litter dry is all about prevention. The fact is that if you wait until your litter begins to cake to start increasing your timer fan settings, it is too late. It takes days or weeks of under-ventilating for the moisture to build up to the point where cake begins to form, so bumping up a timer by 15 or 30 seconds is not going to make up for days or weeks of neglect. Once litter becomes damp, it typically takes a dramatic increase in timer fan settings, i.e. double or triple, to have a significant effect on litter moisture. The problem, of course, is that dramatic increases in timer settings tend to lead to dramatic increases in fuel usage: a costly penalty with today's rising energy costs. Neither is it an environment-friendly option.
Here are 10 steps that can be taken to keep excessive litter moisture from becoming an expensive problem during cold weather.
1. Remove litter caking as soon as the house is empty
Controlling litter moisture starts the day after the previous flock goes out. Make sure to remove caking from the house as soon as possible. Not only does this get rid of some of the moisture in the litter, it tends to aerate the litter a little and that aids the drying process.
2. Keep the house warm
Try to keep the house as warm as possible between flocks. Ideally from the point of view of moisture removal, the house should be above 32°C between flocks but this may not be practical. A practical tip, however, is to close a house up tight at night and run one or two timer fans for a short period. During the day, if it is relatively warm outside, turn on some fans or drop the house side curtains to help remove moisture from the litter. This will use some electricity but it will be cheaper than using heat to dry the litter once the next chicks are in the house.
3. Keep fans running
Run circulation fans between flocks. A little air movement across the litter goes a long way to help remove moisture from the litter.
4. Eliminate house leaks
Work on getting your houses tighter. You have probably noticed that litter caking often occurs in those cooler areas where air leakage is a problem, e.g. side walls, end walls and tunnel curtains. This is because cool air does a poor job of removing moisture from the litter. Ventilation not only brings in fresh air; it is also heats the fresh air before it moves down to bird level. This way, it removes moisture from the litter.
5. Run the fans when pre-heating
Ventilate a little when you are pre-heating a house before delivery of the new flock. This draws out a significant amount of moisture from the litter. By operating a timer fan or two, you can exhaust moisture from the house, which also allows more moisture to be pulled from the litter. This is especially true in houses with fresh litter.
6. Adjust and clean the drinker system
Manage the drinker system properly. If drinker height is too low or water pressure is too high, excess moisture will be added to the litter, which will have to be removed through ventilation. Make sure that drinker lines are clean by flushing on a regular basis. Debris in the water lines can result in leaky drinkers.
7. Use circulation fans throughout the flock
Circulation fans help to remove moisture from the litter in two ways. Firstly, they move hot, dry air from the ceiling down to floor level where it is needed. Second, they gently move air across the litter surface, significantly increasing the rate at which moisture is removed from the litter.
8. Check relative humidity
Use house relative humidity to determine if you are ventilating sufficiently. The ideal relative humidity (RH) is 50-60%. If the RH is above 70% first thing in the morning, your minimum ventilation setting is probably too low and should be increased.
9. Take advantage of day/night difference
Increase timer settings during the day to take advantage of the fact that day-time temperatures are typically warmer than night- time temperatures and the relative humidity will also be lower. It may help to think of the litter as a bank. The more moisture you withdraw during the day, the less you have to withdraw at night when outside temperatures are low.
10. Be bold with timer settings
Do not increase timer settings only 10 or 20 seconds. Get ahead of the game. If you are going to make an increase to your timer fan settings, make it at least a 30-second change.

.jpg?auto=format%2Ccompress&fit=crop&h=167&q=70&w=250)
.jpg?auto=format%2Ccompress&fit=crop&h=167&q=70&w=250)


