The best quality chicks come from the best quality eggs, and there are various checks that hatcheries can conduct to ensure that substandard eggs are rejected and only the best eggs are hatched.
Consider the following guidelines when evaluating eggs arriving at the hatchery.
Conduct routine checks
Conduct routine checks following pre-established parameters. Optimally, check the quality of each batch of eggs arriving at the hatchery. Alternatively, check quality at a regular interval for each breeder flock.
When abnormal results surpass established parameters, increase evaluations and communicate with the breeder farm to troubleshoot potential issues. In particular, eggs from older flocks require extra scrutiny, as shell density, egg size and hatchability can reduce as the flock ages.
Look for visual abnormalities and remove unacceptable eggs based on the following characteristics:
- Egg shape: Although egg shape varies between breeds, a good quality hatching egg is oval shaped with a larger blunt end and a defined sharper end.
- Eggshell: Desired eggshells are smooth, without ridges or calcified lumps (pimples), and have a uniform color that is normal for the breed.
- Egg size: Normal egg weight ranges from 50-70 grams. Remove eggs outside of this range, including double yolk eggs which will be abnormally large. In addition, check for uniformity of size within the batch.
- Cracked eggs: All cracked eggs should be removed, because they are unlikely to hatch and are likely contaminated.
- Dirty eggs: Remove eggs with visible manure, conveyer marks, blood, egg contents or other material.
Use UV light
Not all egg cleanliness issues are seen by the naked eye. Use an ultraviolet (UV) flashlight with 395-nanometer wavelength to identify washed, sprayed, wiped, scraped and floor eggs.
In a dark environment, direct the UV light source onto the eggs and look for shiny and different-looking eggs. Avoid looking into the UV light directly and replace the UV light source when it becomes difficult to see the color differences.
Due to the decreased quality and increased contamination potential of floor and washed eggs, they should not be set. If they do need to be set, place them on the lower trays of the incubator.
Starting temperature
Improper storage and transport from the breeder farm decrease egg hatchability and uniformity.
Use an infrared contact thermometer to measure eggshell temperature in random areas within a batch. Alternatively, use a thermal imaging camera to evaluate temperature across the entire batch.
Due to technology advances, smaller, affordable thermal imaging cameras are now available. Thermal imaging measures the infrared radiation heat emitted from the eggs and converts the temperature into easily observable colors.
Remove eggs with hairline cracks
As the use of automated egg handling on farms increases, hairline cracks are becoming more common. Hairline cracks can cause as many problems as eggs with severe shell damage.
Even short hairline cracks will have detrimental effects on egg weight losses, hatchability, chick quality and contamination rates (which can carry over to hatched chicks). Hairline cracks are hard to detect. The best way to detect them is candling as the light will show the moisture that has entered the crack.
Check for internal quality
Eggs should also be checked for internal quality. A subset of eggs should be candled or opened to check the following:
- Air cell: The air cell is located at the blunt end of the egg and should be less than 2 mm. A bigger air cell is an indication of too much water evaporation due to incorrect or long egg storage.
- Albumen: Good quality hatching eggs contain a higher proportion of thick viscous albumen and only a little thin albumen. Good quality albumen is translucent with a greenish or yellow cast and no meat or blood spots.
- Yolk: The yolk has a uniform color without any blood or meat spots. A firm yolk membrane results in a globular or spherical yolk shape. Take note of mottled eggs, with an uneven color resulting from a more porous membrane allowing water into the yolk. Although some mottling is normal, increased mottling that coincides with decreased hatchability should be discussed with the breeder farm manager.
Evaluate fertility, embryo quality
The fertility and embryo quality of eggs needs to be evaluated. A subset of eggs should be candled or opened and the germinal disc evaluated. The germinal disc will appear as a white dot floating on the top of the yolk. Rate the germinal disc as follows:
- Infertile: A compact white spot with ruffled edges. Eggs should be discarded.
- Fertile, well-developed embryo: Doughnut-like opaque ring with translucent center; diameter approximately 3.5 – 5 mm. Egg is optimal for storage or setting.
- Fertile, under-developed embryo: Embryo too small (≤ 3.5 mm) with white dots in center of opaque ring. These eggs are candidates for pre-storage incubation.
- Fertile, over-developed embryo: Embryo too big (> 5 mm). If transportation was lengthy and at a high temperature, embryos will pass the optimum stage and can no longer be stored.
- Fertile, abnormal embryo: No translucent center, abnormal color. Eggs should be discarded.

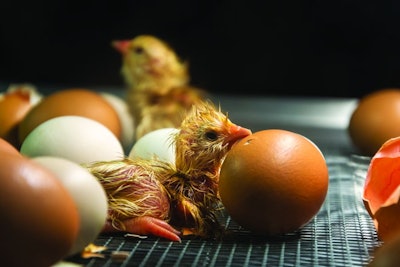
Remove eggs that fall outside of the normal range. (Courtesy Hendrix Genetics Layers)
Tips for successful hatchery management
www.wattagnet.com/articles/6236